

As it turns out, painting trim is time consuming. Seems obvious right? Well, I painted the trim in the our living room white right when we moved in but was hesitant to commit to painting it in every room in the house. So I stopped at the door jams in our hallway. If you look at a door jam there is not really a clear place to stop painting it white to keep the inside of the room all wood. If I painted the door jam both sides would end up white making the inside of each room look weird - with a white door jam but wood trim everywhere else.
Anyway, even without painting the door jams it did take awhile. You know how after a bit of time goes by you forget exactly how long/boring/exhausting a process can be? That must have happened. I did 3 coats on the trim in the living room and it looks pretty nice. So I set out to do the same in the foyer. I used Behr Semi Gloss White paint that I actually picked up for free at a garage sale in both rooms so they would match (the trim from the living room and the foyer touches at 2 corners in the foyer). I developed a nifty little system to keep the paint off the floor using a paint scraper and a fancy little brush.
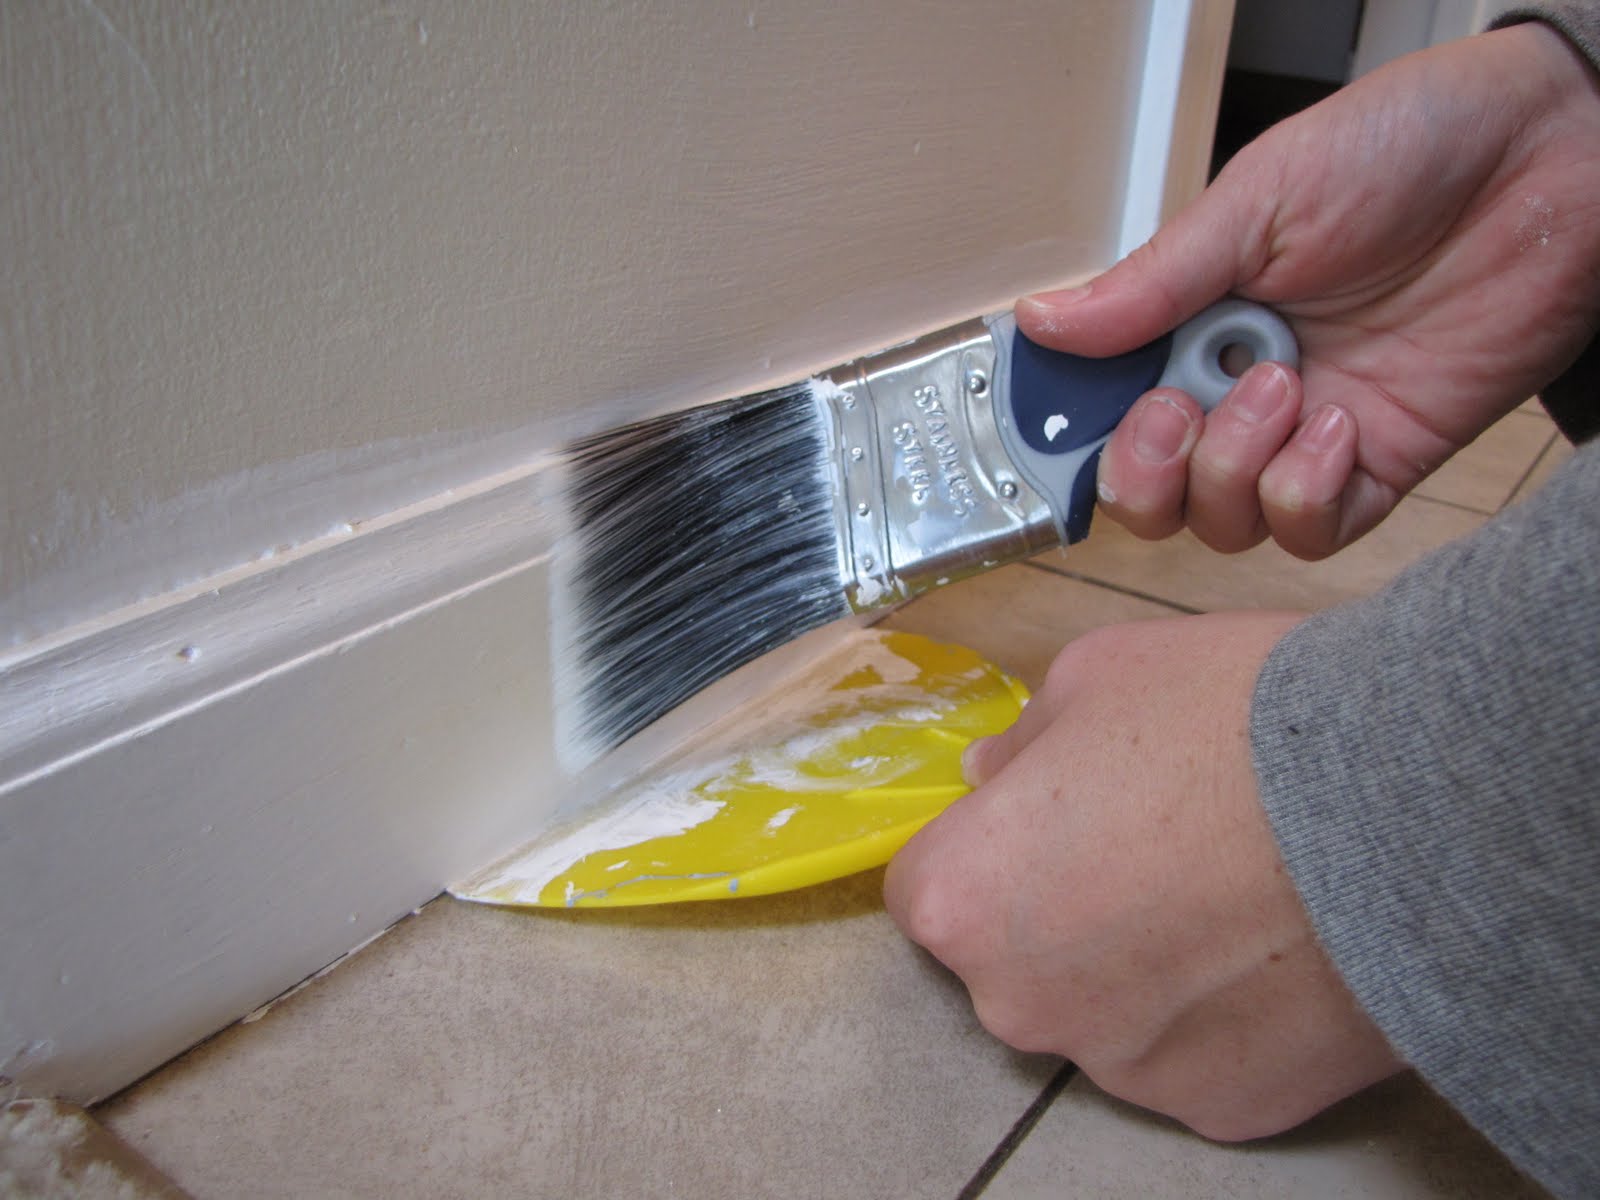
This brush is from Sherwin Williams and cost a mere $5. Worth every penny. It was actually recommended for trim painting on Young House Love (one of my favorite blogs). It has a short handle for easy maneuvering and an angled brush especially nice for getting in corners and cracks and getting close to the floor. The very best part of my plan though is to paint the trim before painting the walls - this way it does not matter if I get white paint above the trim. I only have to worry about keeping the floor clean. I have not been patient enough to paint the rest of the house's trim (which I plan to do eventually) before painting the walls though, so I am sure lots of painters tape to block of the walls will be needed in the future.
 |
| Trim After 1 Coat |


Once your hardware is removed check to see if your trim has any obvious holes or dings. Mine had some pretty serious staple holes. As you can see in the picture below, I realized this after I started painting. I just whipped out my handy wood putty and filled them in. (Note: You are supposed to let wood putty set 24 hours before painting over it - I did not and nothing catastrophic has happened yet).


Back to the door jam painting - door jams are funny little things, they are like 4 sets of trim in one place. Trim on either side plus some extra cracks and corners thrown in between. Basically, it took me 4 times as long than just painting floor trim that is the same length. After about 3 rounds I had a pretty good system developed here too. First, I took my angled brush and ran it down all the crevices inside the door jam (the wood piece the door closes against) and on the outside of the trim (against what will eventually be the painted wall). The last thing I did was brush paint on the flat surfaces - this allowed for the smoothest finish, and the least amount of touch up.
 |
| After 1 Coat |
 |
| After 2 Coats |
 |
| After 3 Coats |
After 2 coats with the paintbrush on the door jam I rolled the final coat. I wanted a smooth final coat of paint and a roller was the only way I could get that. I used a small roller so I wouldn't be flinging paint all over the place and just did a nice thick final coat. (These big tupperware containers are the perfect width for a small roller)

 |
| One Coat |
 |
| Two Coats |
1. Gather the supplies you need: angled short handled brush, paint scraper, semi-gloss white paint, small roller (optional).
2. Remove the doors and the hardware.
3. Dust your trim (especially the little ledge on top).
4. Protect your floors and walls (best to paint the trim before you paint the walls, that way it does not matter if you get paint on the walls).
5. Wood putty any dents or dings or holes in your trim.
6. Begin to paint - do the floor trim first.
7. Paint the cracks and crevices of the door jams - make sure to get the edge that touches your painted wall and the top of the door.
8. Apply a smooth even coat to the flat surfaces on the door jam (with roller if you can).
9. Repeat steps 5-7 at least 3 times.
10. Replace hardware and doors after letting the trim dry 3 days.
11. Enjoy your beautiful crisp white trim.
I also painted the inside of the front door! It was sort of a very blah tanish off white color. Now it is crisp and clean and white. Check out the progress shots below. (I just used the same paint as I used for the trim and did 3 coats using my small roller - make sure to tape off your hardware).
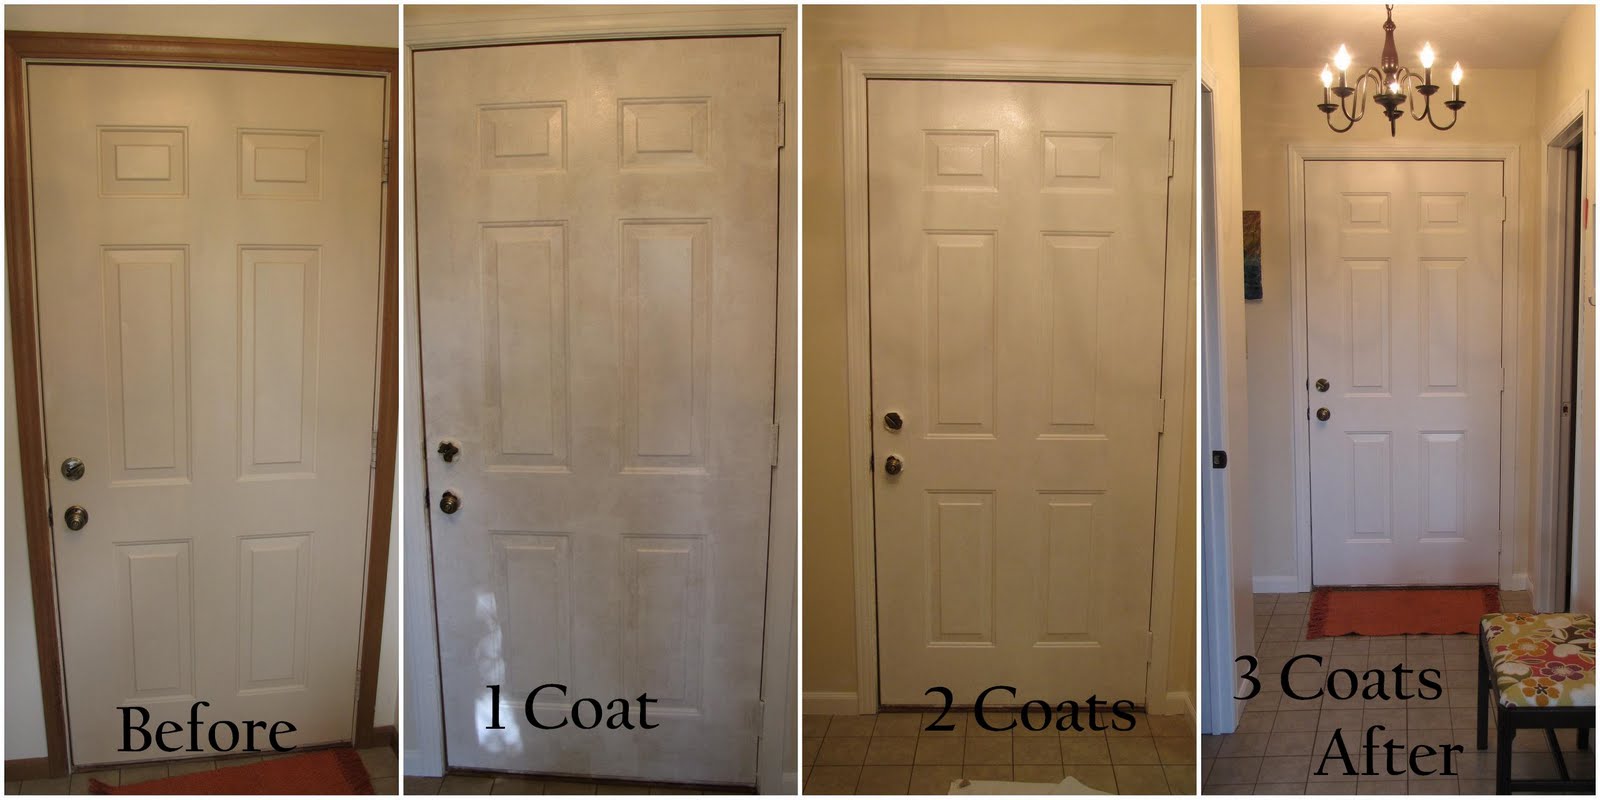
Also coming soon: more details about painting your interior doors and a front door painting tutorial!
No comments:
Post a Comment